Saturday, November 8, 2014

Flourless Chocolate Cake


6.5 oz bittersweet chocolate
6 oz butter
1 cup sugar
4 eggs and two egg yolks
2 tbs brandy
2 tsp vanilla
zest of one large orange
1/4 tsp cracked black pepper
1/2 cup cocoa powder

 Line a 10-inch springform pan with a round of parchment paper. Grease the paper and the sides of the pan liberally with butter.

Melt the chocolate and butter in a double boiler (or a metal bowl over a pot of simmering water). Whisk in the sugar. Beat the eggs a little and whisk the brandy-vanilla-orange zest mixture into it. Whisk the egg mixture into the chocolate mixture. Add the pepper to the cocoa powder and stir well. Sift the cocoa powder over the surface of the batter and then whisk it in thoroughly. Batter should be smooth. Pour into prepared pan. Bake at 375 F for 35 minutes.

Ganache:
4 oz milk chocolate 4 oz heavy whipping cream
heat the the cream until almost boiling but not yet boiling. Pour over chocolate (I used baker's chocolate disks but if you have a big chunk of chocolate chop it up). Stir until smooth and shiny.

Pour the ganache over the cake and let it cool. I let it set for about 5 minutes, then added the raspberries, then let it set until the ganache was firm. 

Sunday, October 26, 2014

Deer Pâté! Trigger warning for blood...


My recipe:
1 venison liver
1 pint buttermilk
1 shallot, diced
2 cloves garlic, roughly chopped
1/2-1 tbs rosemary (depends on taste)
1/2 tsp fresh cracked black pepper
1/2 tbs kosher salt
1/2 tsp five spice
1/2 tsp nutmeg
1/4 tsp ground cardamom
1/3 cup brandy
1/4 cup cream
2 tbs butter for the pan, plus 6 tbs melted butter for the puree
Prepare the liver and soak it in the buttermilk for a while--I did it for 5 hours, you can do it overnight if you care to (you might have to change out the buttermilk if it gets too bloody). Cut into smaller pieces, rinse, and pat dry. Season with salt and pepper. Heat 2 tbs butter in a cast iron skillet and sweat the shallots. Add the garlic and the liver. Cook for a few minutes on medium and then add the rest of the spices. Cook for a few minutes more and then add the brandy. Cook for about 16 minutes total (my internal temp read as 158, which is safe). Take off the heat and let sit for about 20 minutes. Process in a cuisinart, slowly pouring in the cream and the rest of the butter (melted). Process until fairly smooth. Work through a sieve to achieve an even smoother texture.

Smoked Pork Tenderloin!


RUB: 

2 pork tenderloins, trimmed.
8-10 strips bacon

1 tsp smoked paprika
1/2 tsp espresso powder
2 tbs kosher salt
1 tsp fresh ground pepper
1/4 cup brown sugar
1 tsp granulated onion/onion powser
1 tsp garlic powder
1 tsp dried oregano
1 tsp dried thyme

Rub it all on the pork, let sit for two hours in the fridge. Wrap the tenderloins in the bacon and place in a smoker at 220 degrees F. I used apple and hickory woods. Cook for 2 hours--30 minutes prior to finishing, glaze with a mixture of 1/3 cup honey, 2 tbs vinegar, and 1 tbs maple syrup. Brush this on the wrapped loins 30 minutes before they are timed to come out. When they are done, the internal temp should be around 150.

Saturday, July 12, 2014

Stewed pork with cucumber and tomato salad


Made some pork shoulder in my pressure cooker! We are so grateful for this wedding gift, and I've been using it!


Recipe:
3-4 lb pork shoulder
1/2 yellow onion, chopped
1 serrano chile, diced
2 tbs. achiote (annato) seeds
1 carrot, diced
2 stalks celery, diced
1 tsp cumin
4 allspice berries
1 can crushed tomatoes
1/4 cup cider vinegar
1/2 cup orange juice
1/2 beef or pork stock
1 tbs. kosher salt
Cut the pork into large cubes (mine were about 1.5 inches). Salt the pork and brown in pressure cooker in batches, then remove. Add the onions, peppers, carrots and celery and sweat. Add the spices Return the pork to the cooker and pour over the liquid. Seal the lid and cook for 35 minutes on medium pressure (this was according to my pressure cooker's guide--yours might vary, so double check).

Tuesday, July 8, 2014

Yellow Split Pea Soup in the Pressure Cooker

We are very grateful for our new pressure cooker, and for our new dishes! Thanks to those who bought us new gifts...they are definitely being used! 


Recipe:
1.5 cups yellow split peas
6 cups chicken stock. I also added some of the rib stock I made a few days ago
1 sweet potato, peeled and diced
1 small yellow onion, roughly diced
3 large garlic cloves smashed
1 to 2 strips of bacon, cut into sections (I used a cherry wood smoked bacon that is fabulous)
1/2 tsp cumin
1 tsp kosher salt (and you will need to add more to taste when it's done)
1/2 tsp cracked black pepper
1 carrot, coarsely chopped
Toss your ingredients into the pressure cooker, seal, and cook for 35 minutes. The vegetables and bacon will essentially dissolve, giving it a wonderful flavor. I gave it a pass with my immersion blender just to make sure the consistency was smooth, but this soup turns out pretty smooth without much fuss. If you want to do a vegetarian version, I recommend using a high quality vegetable stock and a dash of curry powder instead of the chicken stock and bacon.

Saturday, June 14, 2014

Grilled Lamb Loin Chops

 So last night I wanted to make something a little special for us, but I didn't have a huge amount of time. I opted for lamb because I found some beautiful loin chops at the store and I almost never make it at home. If you're short on time as I was, make the marinade first thing and get the lamb into it, then work on the sides in the interim.


Recipe:
for the lamb:
4 boneless lamb loin chops (you can also use bone in, I just went boneless because that's what the butcher had). Trim the excess fat (or ask the butcher to do it before you buy). Also, make sure they're at least 1 inch thick.
1/3 cup chopped fresh parsley
2 cloves garlic
1/3 cup olive oil
1/2 tbs sea salt or kosher salt
2 tbs rosemary leaves
1 tbs thyme leaves
the juice of one lemon
Combine the garlic, herbs, salt and lemon juice in a food processor and pulse while slowly drizzling in the oil. It should make a yummy green paste. Rub that on the lamb loin chops and marinate it in the fridge (1-4 hours, preferably closer to 4 but I was in a hurry so I only marinated them for 90 minutes). Heat your grill to high (I got mine up to about 500 degrees).  Take them out of the fridge 30 minutes before grilling, and wipe off the excess marinade. I like to give a quick dusting of salt and pepper before they hit the grill. Grill them for 5 minutes on one side, then carefully flip them and grill for another 5 minutes or until the lamb has an internal temperature of 140 degrees F. This should give you medium-rare, but grills vary so keep an eye on them. Allow them to rest for 6-8 minutes, wrapped in foil to keep them warm.

for the potatoes:
4 medium russet potatoes
kosher salt to taste
pepper to taste
2 tbs olive oil
Scrub the potatoes, cut them in half lengthwise, then cut each half into wedges. Toss in the oil and spread on a baking sheet. Sprinkle liberally with kosher salt and pepper (I also used a little garlic salt at the finish). Cook at 400 degrees for about 30 minutes, turning once halfway through. If your wedges are on the larger side, you may need 35 minutes.

The spinach is pretty self explanatory. I sauteed it in a little butter until it wilted down, gave it a squeeze of lemon juice and some salt. Next time I'll try to do something fancier with it!

A note regarding portions:

We had lots of leftover potatoes, and we only at 3 of the loin chops between the two of us. If you're making this recipe for two, prepare for some delicious leftovers!

Wednesday, June 11, 2014

Venison Burgers!

 So last night my beloved came home hungry, and I didn't have time to go shopping. Fortunately, thanks to his hunting acumen, we have venison in the freezer! It's always best to use meat before you freeze it, but when you have that much meat, well, you pretty much have to freeze it unless you want to host a dinner for 30 people. I put it to thaw in the fridge before I left for work and it was ready to go when I got home.


Recipe:

1 lb. ground venison (we had ours done at a processing place)
salt and pepper
1/4 cup minced white onion
1 egg yolk

Mix the above ingredients very gently with your hands. Try not to compress the meat very much. Form into two equal patties and put in the fridge.


For the caramelized onions and mushrooms:

Take one tbs. butter and melt it in a skillet until it starts to bubble slightly. Add 1/2 a white onion (thinly sliced) and saute on low-medium heat for about ten minutes. Sprinkle with salt to taste and lower the heat a little more, cooking about 20-30 minutes or until onions take on a nice brown color and an almost jammy consistency. Saute 1 cup mushrooms in 1/2 tbs. of olive oil (make sure you salt the mushrooms to your taste) until cooked down and no longer releasing liquid. Combine with the onions.

Grill patties for 6 minutes per side on medium-high heat (I use a gas grill, temp set at 500 degrees). Do not press down on the burgers or flip them more than once. Let rest for three minutes. Serve on your bread of choice (I used toasted sourdough but a ciabatta roll, toasted brioche or potato bread would be awesome, too).

Friday, March 21, 2014

Seared Yellowfin Tuna with Herb Salad and Sriracha Mayo

My lovely brought home a whole tuna from a fishing trip, and I had to figure out where to start with it. He asked me to sear it, so I did! Here's how I did it...


4 8oz tuna steaks
kosher salt
fresh ground pepper
1 tsp sesame oil
1 tbs vegetable oil

1/3 cup mayo
1 tbs Sriracha
1 tbs lemon juice

For the salad:
I used a mix of arugula, dandelion greens, fresh basil, and radicchio. I made the dressing with 1 tbs. sesame oil, 1 tbs. soy sauce, 1 tbs. rice wine vinegar, 1 tbs. diced ginger, 1 tbs. vegetable oil and  1 tsp fish sauce.

For the mayo: combine the mayo, lemon juice and Sriracha and let sit while you prepare the tuna

If you're working with freshly caught tuna as I was, I would cut out the blood line.  With a sharp knife, make an incision on either side of the blood line so that the two incisions create a ‘V’ shape and remove.

Let the tuna sit out of the fridge for ten minutes, and coat with kosher salt and pepper. Heat a cast iron skillet until it is very hot. Add the vegetable and sesame oils and then add the fish. Let it sear in the pan for 60-90 seconds, then flip it. Let it cook another 60-90 seconds, then remove it from the pan. Let it rest a few minutes and then cut each steak diagonally into 4-5 slices. Drizzle the mayo on top.


Tuesday, November 19, 2013

Easy Fajita Chicken with Vegetables, Beans and Rice


Black beans and vegetables:

Slice:
1 green bell pepper (make sure to take out the seeds and white parts)
1 red bell pepper
1 yellow bell pepper
1 yellow onion

Use:
1 can black beans (you can cook your own beans, but I do not have the time).

Saute in a large pan in 1 tbs. olive oil on medium for about ten minutes, tossing lightly. Add a teaspoon of salt and teaspoon of pepper. Drain the black beans and rinse them in a colander. Add them to the hot pan and stir vigorously. Cook until the veggies are slightly soft and the moisture in the pan is almost gone.

Marinade recipe:

1 tbs vegetable oil
2 tablespoons lime juice 
1/2 teaspoon ground black pepper 
1/2 teaspoon chili powder
1/4 tsp cumin
1 tsp kosher salt

Use 1.5-2 lbs thin cut chicken breasts. Marinate in a plastic bag about 30 minutes. Grill at about 450-500F for 6 minutes per side.  Make sure it's around 160 degrees F inside using a meat thermometer. Let it rest for 10 minutes wrapped in aluminum foil.

For the rice, I used a rice cooker. If you do not have a rice cooker, here's what you need: 

1 cup rice
2 cups water
1/2 teaspoon salt
1/2 tbs butter

Bring the water and salt to a boil. Add the butter (optional--it adds flavor, but it's not necessary). Add the rice and cook for approximately 20 minutes. 

After you fluff the cooked rice, put the bean veggie mix on top. Slice the chicken and put it on top of the beans and veggies. There you have it: a healthy meal that is pretty affordable (and a staple of our house).

Thursday, August 15, 2013

Mole Negro in the Slow Cooker


My fiance wanted chicken mole--typically I make it over the stove, but today we were busy and I thought it would be cool to try it in the slow cooker, and it turned out great!

Ingredients:

2 lbs chicken thighs deboned

1 medium yellow onion, rough dice
3 oz. unsweetened chocolate
3 tbs. olive oil
1 tbs sesame seeds
1/4 cup raisins
1/2 cup pumpkin seeds (or almonds, but I used pumpkin seeds)
2 chipotle peppers in adobe sauce
1 dried ancho deseeded and stem cut out
1 tbs brown sugar
1/2 tsp cumin
1/2 tsp cinnamon
1/4 tsp coriander
1 28 oz can crushed tomatoes

Place the chicken in the crockpot on high and let sit while you get the sauce ready. Chop the chocolate and place in blender with the shelled pumpkin seeds, sesame seeds, raisins and other ingredients. Seriously, just put them all together, they'll be okay. If your blender is small, you can blend in two batches. Blend well and, if you like, strain the sauce (I strained mine through a sieve because I think it is a better presentation). Pour the sauce over the chicken and cook for 2 hours on high followed by 4 hours on low. Chicken should fall apart when poked with a fork.


Thursday, July 4, 2013

Laksa!

shrimp laksa topped with cilantro, coriander
radish sprouts and crispy shallots

Tonight I made laksa, because I was craving it. It has a lot of ingredients, but it is a fairly easy dish to make--a spicy noodle soup (usually found in Malaysia and Indonesia). This version uses items that should be fairly easy to find. I simplified things while trying to still get that delicious sour/spicy/savory laksa flavor.

You will need:

1.5 tbs red curry paste (or preferably laksa paste, if you can find it at the market)
2 tsp tamarind paste
2 tsp vegetable oil
3 cups vegetable stock
10 oz. coconut milk (you can use lowfat if you want to cut the calories)
1 tbs chopped fresh ginger
1/4 cup diced onion
4 cloves garlic, chopped
2 tablespoons fish sauce
1 tsp sugar
1 teaspoon light soy sauce
1 jalapeno, sliced
1 bunch each of fresh coriander and fresh cilantro
radish or bean sprouts

8 oz dried flat wide rice noodles

1 pound raw medium shrimp, peeled and deveined (Note: you can leave the tails on or take them off--I like to leave them on because it adds extra flavor, but you can remove the tails beforehand to make things easier on your diners). 

I also added mushrooms because I like them-- I used shimeji or Beach mushrooms

Optional: fish balls, puffed tofu, or any other product you'd like to add.

Saute the onion, jalapeno and ginger in the vegetable oil until slightly soft. Add the garlic and the curry paste and reduce the heat, cooking for about 3 minutes more. Add the tamarind paste. Add the coconut milk slowly, and then add the stock, fish sauce, sugar and soy sauce. Whisk together and bring to a simmer for 5 minutes. Add the mushrooms to the broth at this point if you want to add mushrooms. While it is simmering, soak your rice noodles in boiling water for about 7 minutes. Drain the noodles and shock them in cold water, then set them aside. Add the shrimp to the broth (and add fishballs if you are choosing to use them) and cook for an additional 3-5 minutes. To serve, put the noodles in a bowl and spoon the soup over it. Top with the sprouts, cilantro and coriander leaves, and a spritz of lime juice if you want a little extra acid.


Tuesday, June 25, 2013

Roast Chicken

I was looking for something simple to make for us tonight, so I decided on roast chicken. I picked a 4-pound free range chicken from our local grocery store.


Rinse the chicken (inside and out) in cold water and pat it dry. If it comes with innards, pull them out and, if you like, save them for a sauce. Put the chicken on an oiled roasting rack in a basic roasting pan. I rubbed it with two tbs. butter (cutting little slits at the top to rub a bit of the butter under the skin). I stuffed the cavity with two lemon halves and two onion quarters, and a bunch of tied up sage, thyme and rosemary. I covered the outside with sea salt, lemon pepper, a pinch of cayenne pepper, and a pinch of oregano.

Roast it on the rack for 20 minutes per pound at 400 degrees F. If it starts to get too brown on top, tent it with foil for the last 10-15 minutes. Check it with a meat thermometer, and make sure that the thigh temperature is at least 160 degrees. Let it rest for 15 minutes while you prepare your sides.


Sunday, May 26, 2013

Fresh Rigatoni

 I made rigatoni today with an extruder attached to my Kitchen Aid:


For the dough, I used:
3 cups flour 4 large eggs 1 tsp olive oil 1/2 tsp salt
Knead dough well until it comes together. Let it rest for 1-2 hours, then take it out and knead it again. If it is sticky at all, knead in a handful of flour and work it until it is no longer sticky. Put in an extruder (I use a kitchen aid) and allow to dry in a floured tray for 45 minutes. Boil for 6-7 minutes, and finish in sauce of your choice.

I made a meat sauce:


For this, I used:

1 pound lean ground beef (95%)
1 tbs olive oil
1 shallot, diced
4 cloves garlic, chopped
1 handful fresh basil
1 tsp salt
1 large can crushed tomatoes
1 jar pasta sauce
4 strips of bacon, crisped

Cook the beef at medium-high heat in a sturdy saute pan until it is no longer pink. In another pan, saute the shallot in the oil until soft, then stir in the garlic and cook on low heat. Add the crushed tomatoes and cook for about 5 minutes. Stir in the cooked beef and simmer until it starts to thicken, then add the pasta sauce and simmer for another 10 minutes. I chopped some of the basil and added it in to the sauce and used the rest for garnish. Towards the end of the simmering, add the crumbled bacon and stir well. The sauce should have a nice shine but should not have any grease sitting on top. Stir in the cooked pasta and let sit for a few minutes before serving. Garnish with basil. 

Wednesday, May 15, 2013

Old Fashioned Ginger Bread


1 cup light brown sugar
2 tablespoons molasses
4 tbs butter
1.25 tsp baking soda
2 cups flour
1 egg
2 tbs buttermilk
1 cup hot water

1 tsp ground cinnamon
1 tsp ground ginger
1/2 tsp cloves (if you like them)
1/4 tsp nutmeg
1/2 tsp salt

In a large bowl, cream together the sugar and butter. Beat in the egg, and mix in the molasses. In a bowl, sift together the flour, baking soda, salt, cinnamon, ginger, nutmeg, salt and cloves. Blend into the creamed mixture. Stir in the hot water. Pour into the prepared pan. Bake at 350 for 45 minutes in a standard loaf pan until the knife comes out clean with a moist crumb.


Monday, April 8, 2013

Weeknight Meal: Grilled Pork with Asparagus and Polenta

I got home a little early today, so I went to the store and got pork chops, asparagus, corn meal and beef broth. For $16, I created a very nice meal:


It's really easy--so easy, you don't even need a recipe. Here's what you need:

Pork chops
Asparagus
Corn meal
Beef broth
olive oil
apple cider vinegar
brown sugar
your preferred spices

Take the pork and marinate it in a plastic bag with olive oil, apple cider vinegar, an ounce of brown sugar and some ground ginger (you could also use cloves or ground mustard or fennel...use your preference!). Leave it sitting for about 45 minutes in the fridge. Put the asparagus on some foil, and drizzle with olive oil and sprinkle with salt and pepper. When the pork is ready, put it on the grill on medium (and put the asparagus, still on the foil, on the upper rack of the grill). Grill the pork for 6-7 minutes on each side. The asparagus needs about 10 minutes. While it's cooking, make the polenta.
Boil 2 cups of broth and one cup water. Add 1 cup corn meal and 1 tsp salt. Boil slightly and stir constantly. After five minutes, take off heat and keep stirring. Beat in a tbs of butter.

Take the pork and asparagus off the grill (make sure the pork is at least 145 degrees F in the center). Let the pork rest 8 minutes. While you're letting it rest, plate the asparagus and the polenta. Adjust the salt and pepper levels of the polenta, or add some garlic powder, onion powder, basil, whatever you want! Eat in the living room while watching dumb television (that's what we did!)

Saturday, March 16, 2013

They See Me Grillin'...

I made burgers on the grill. To go with them, I roasted some mild chiles on the grill and then paired them with roasted orange peppers and onions for a burger topping. I also grilled enough chicken to feed us all week, since I've been spending so much time on campus.

I cut the chiles down the middle and washed out the seeds (which I planted out back--here's hoping they take!). I then lightly brushed them with olive oil and set them on medium on the grill for 10-15 minutes (about 7 minutes a side, or until the skin starts to blacken). Here's the key: don't worry if they looked burned, just taken them off the grill after 15 minutes and put them in a bowl. Cover the top of the bowl tightly with plastic wrap and let them steam for 10 minutes. Then you should be able to peel off that black skin and have perfect, soft, smoky pepper flesh. Boy, that sounds almost dirty...


The rest of the veg I cooked in foil on the grill. I combined them all to make a tasty burger topping:


I marinated the chicken in rice wine vinegar, vegetable oil, Lea & Perrins, 
lemon pepper and 4 chopped fresh garlic cloves. Let it sit in there for 2 hours. I never like to give cooking times with these recipes, because grills vary, chicken breasts vary, etc. I had normal, hormone-free chicken to work with, and I grilled it for 9 minutes on each side and let it rest for 10 minutes wrapped in foil. This time it was 9 minutes, but you never know. Use a meat thermometer! I don't take the chicken off the grill until it's 160 degrees F. A lot of recipes will say 165 F, but the chicken continues to cook as it rests. You'll find you get juicier chicken if you pull it out at 160 F. 


For the burgers, I use a combo of 80% and 93% ground beef. I add an egg yolk to 2 pounds of meat, along with some Lipton's onion soup mix, 1 tbs of soy sauce, and lots of pepper. I always make a well in the middle of the burger before I cook it, so it doesn't swell in the middle. 


We ate them with sesame seed buns, romaine lettuce, fresh tomatoes, the grilled pepper-onion mixture, and lots of spicy mustard. Delicious!


Saturday, January 12, 2013

Onsen Eggs!

Today I'm working with onsen eggs. That means eggs slow-cooked in the shell. Originally, the term "onsen" refers to a hot spring--eggs that are cooked in natural hot springs until they are poached to perfection.


I made a pho for my eggs! Here is what I used:

3 cups beef stock
3 cups chicken stock
1 tbs grated fresh ginger
2 cloves garlic, diced
1/2 cup diced yellow onion
2 cups shredded carrot
3 tbs vegetable oil
2 cups button mushrooms
1 cup shitake mushrooms
2 tbs fish sauce
2 tbs soy sauce
2 tbs rice wine vinegar
2 tsp sugar
30-40 fresh medium sized shrimp
eggs

fresh cilantro
fresh mint
fresh green onions

Sweat onion and half the carrots in vegetable oil for 10 minutes on low-medium heat. Stir in garlic and cook 1 minute more. Add stock, fish sauce, sugar and soy sauce. Bring to a simmer. Soak the noodles in very hot water for 5 minutes. Shock in cold water and let sit.

For the onsen eggs:
Place eggs in a well-insulated pot or thermal cooler. Pour over enough very hot water to cover them completely (water should be about 170-180 degrees F). Cover and let sit 15 minutes.

Add noodles to soup, return to a simmer and add shrimp. Cook only until shrimp is barely pink (5 minutes). After it is taken off the heat, add the vinegar. Taste it and add salt if necessary. You can also add some chili sauce if you want it to be spicy.

Serve soup in bowls and crack an onsen egg over each one--you should be able to crack the shell and pour the poached egg out in one easy go. If it doesn't come out, it is probably overcooked. Garnish soup with the remaining carrots, cilantro, green onions and mint.

Wednesday, January 2, 2013

Challah

Challah is a great bread to make for the holidays, or for any special dinner party, brunch or family gathering. It is a traditional Jewish bread that is eaten on the Sabbath and during certain holidays. It has egg in it, so it has a nice, rich texture. There are lots of semi-sweet egg breads out there, such as Portuguese sweet bread and brioche and Hawaiian bread, but I think challah is one of the most versatile egg breads out there. Also, it is braided and finished with an egg wash, so it is a very beautiful baked good that you can make for a dinner for minimal cost and effort.

Here is what you will need:

1.25 cups warm water (I don't like to go over 100 degrees, just to be safe, as yeast can be finicky and hot water can kill them)
2.5 teaspoons active dry yeast
1/4 cup honey
1 tbs. sugar
2 teaspoons salt
5 cups flour (I used bread flour, but all purpose is great, too)
2 eggs
1/3 cup olive oil

First, mix the honey with the warm water to dissolve. Stir in the sugar and the yeast. Let sit 10 minutes until there is a bunch of foam on the top (this tells you that the yeast is alive and ready to make delicious bread). I like to do this in my Kitchen Aid mixing bowl because it can go straight to the mixer once you are ready to fold in the flour.

Whisk the eggs, oil and salt briefly and stir it into the yeast mixture.

Mix in flour, one cup at a time, incorporating as you go. If you have a standing mixer, use a dough hook (it is so much easier) and let it go for about 8-10 minutes or until the dough is shiny and forms a tight ball. If you are doing it by hand and have experience, give it 10-12 minutes and make sure it is elastic, supple and forms a nice ball. I like to pinch it a bit to make sure it has good texture. It will look a bit like this:


Now you are ready to let it rise. Oil a bowl lightly and put the dough in it. Put a damp cloth over the bowl and put it in a dark, dry place, such as a turned off oven or a pantry. It helps if it's a little warm, so if you want best results and you don't have an incubator, turn your oven on for a few minutes, then turn it off and put the bowl in when it's just barely warm. Let it rise for 90 minutes. 

Punch it down and divide it into two sections. Each will make a loaf. Cut each section into three pieces and roll them by hand into tubes. Now we start the braid. Pinch the three tubes together at one end and form a braid like so:


Keep braiding until you reach the end. Then pinch the ends together and fold them under the loaf. Don't worry if they look a bit rough, because you are going to let the loaves rise again before you bake them.


Let the loaves rise for another 45-60 minutes. Preheat your oven to 350. Beat an egg with a few tablespoons of milk and brush the loaves with the mixture. Bake them for 30-35 minutes.  They should be golden brown (and depending on your egg wash, may get very dark on top).

This recipe makes two loaves. I used more wash on one loaf than the other, so you can see the difference!


Suggestions for Challah (beyond simply eating it with dinner):
*toasted with butter next to a hot cup of soup
*served with hummus before dinner
*made into French toast on a cold morning
*added to a bread pudding
*grilled cheese with brie, apples and a little sharp cheddar

Saturday, September 8, 2012

Shrimp Balls in Miso Broth

I often think of my time in California, where I spent a great deal of my childhood in a Chinese restaurant in Redwood City. My mother was good friends with the owners, Paul and Ann Chin. I was five, six, and seven years old when I ran around the dining room and the kitchen. The chefs spoke mostly Cantonese but were very kind to me. They showed me how to make wontons and shrimp jioa zi. I also had all the pork fried rice I could eat. In the back room was a space for games, a place where locals came to play video games and ping pong tournaments (I am not kidding) and for Paul and Ann's parents to play sevens and mahjong with their friends. It's here that I learned that soybeans were delicious, and that shrimp can take on many forms. 

Here's a recipe for a dish I made the other night--shrimp balls in miso broth with seaweed, garlic and spinach.


for shrimp balls:

1 lb large shrimp

1 egg yolk
1 tbs cornstarch
2 tsp minced ginger
1/2 tsp salt
pepper to taste

for broth:
miso paste
water
fresh baby spinach
garlic cloves
dried seaweed (nori)


Pulse the shrimp meat in a food processor fitted with the chopping blade about 10-15 times. Then add the egg, cornstarch, ginger, salt, and pepper and pulse again until incorporated. Chill for 30 minutes.  Form "meatballs" out of the shrimp mixture and set aside. 


In a pot, take 1 quart of water, heat it to just before boiling, and add 3 tbs miso paste (white is good, but you can use any kind). Add garlic (about 4 cloves smashed) and add the nori (as mush as you'd like) and let soften. Throw in a handful of spinach (I like the flavor it adds, plus the extra vitamins). Let simmer for 10 minutes. Add the shrimp balls and simmer for 10-15 more minutes. Finish with scallions. 

Saturday, August 18, 2012

Assassin's Creed Cake

I've been out of commission for a minute, as I started school and have let my blogging go by the wayside. I didn't stop taking pictures or cooking, however.

A few weeks ago, I made my nephew his birthday cake. He loves Assassin's Creed, an historical video game series that features lots of daring do, sword fights and maps of Rome and Constantinople. So I made him a theme cake, using the symbol from the game. For simplicity's sake, I'll just explain the decorating techniques here. I used two nine inch rounds of white sponge cake (made with vanilla extract and greek yogurt to cut sweetness) and a filling of strawberry jam cooked with honey, cardamom, and a vanilla bean with lemon juice at the finish. I made a standard white eggless buttercream (butter, icing sugar, vanilla and whole milk). I used an icing spatula and a dough cutter, dipped in very hot water, to finish the surface of the cake.


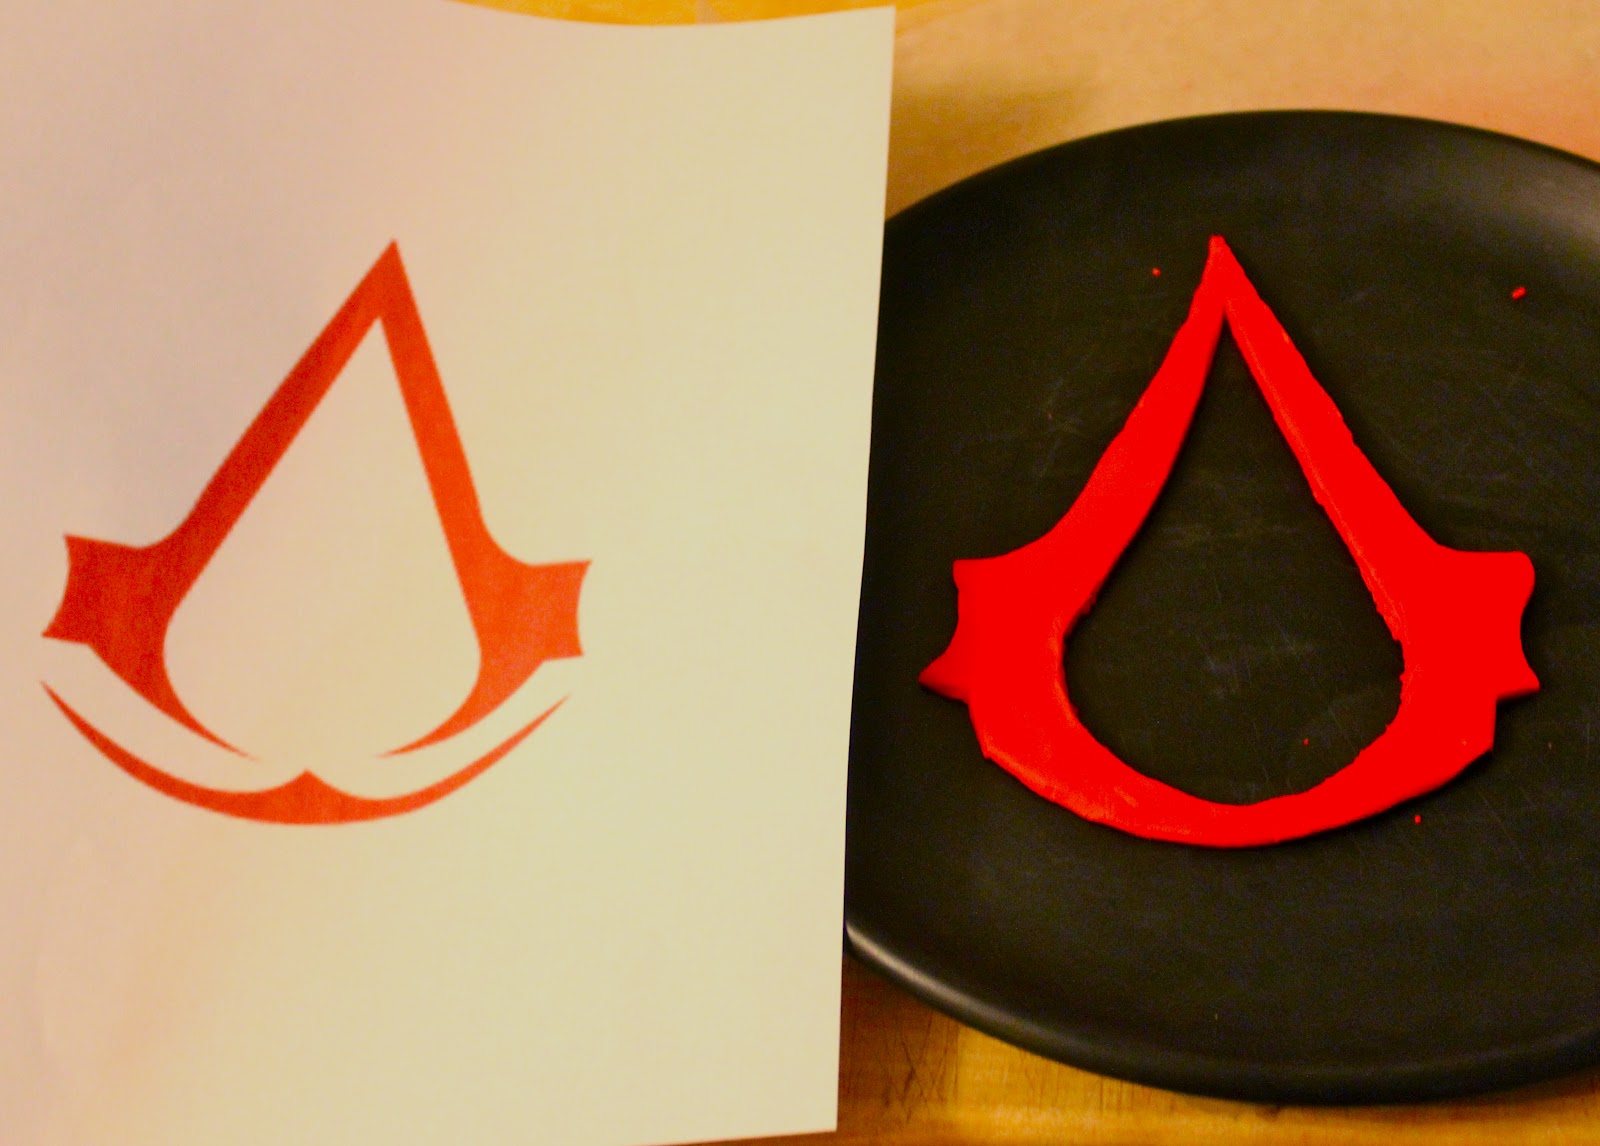
I used red and black fondant (commercial) for the decorations. To make the Assassin's symbol, I used a printed stencil and cut the fondant with a paring knife:


My niece helped make the molded fondant rosettes. Note: always oil that mold and don't let the fondant get too warm, or it will stick. 


I then added the birthday number to the top of the cake, and we were ready to go!


As you can see from the cross section, the cake rose well and the filling is nice and even.